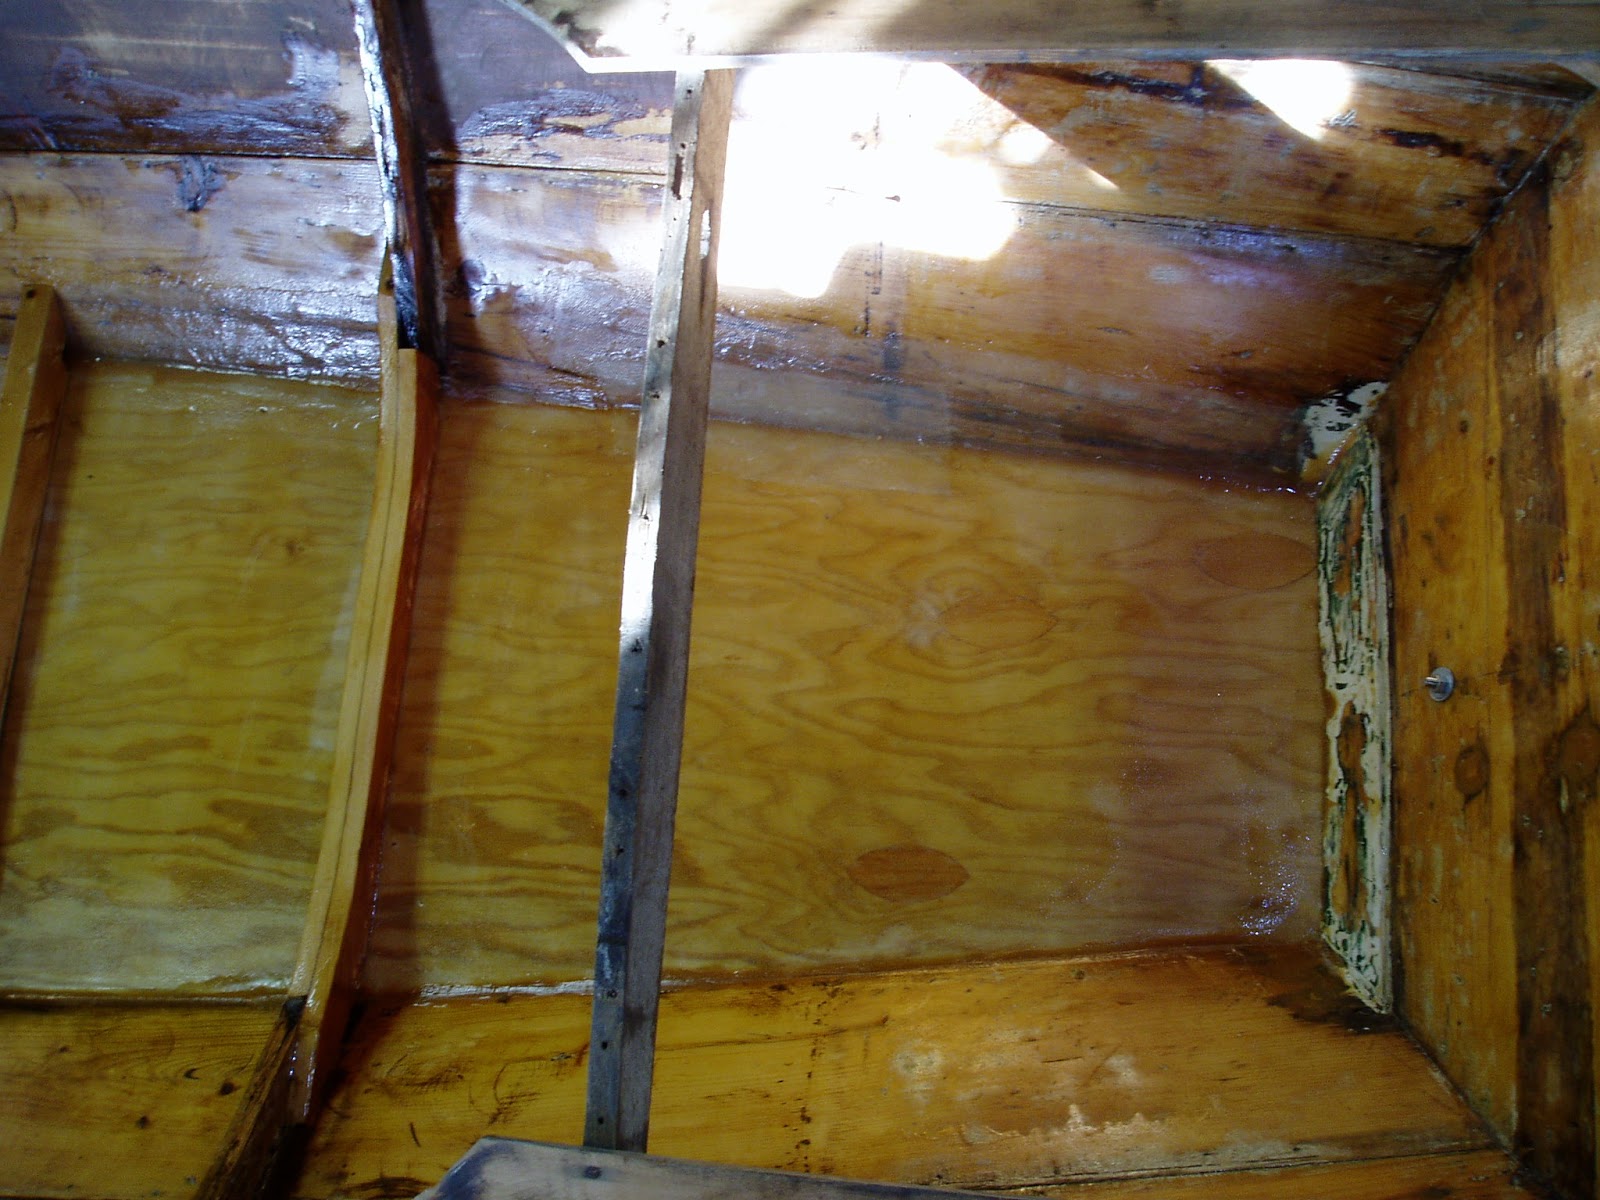
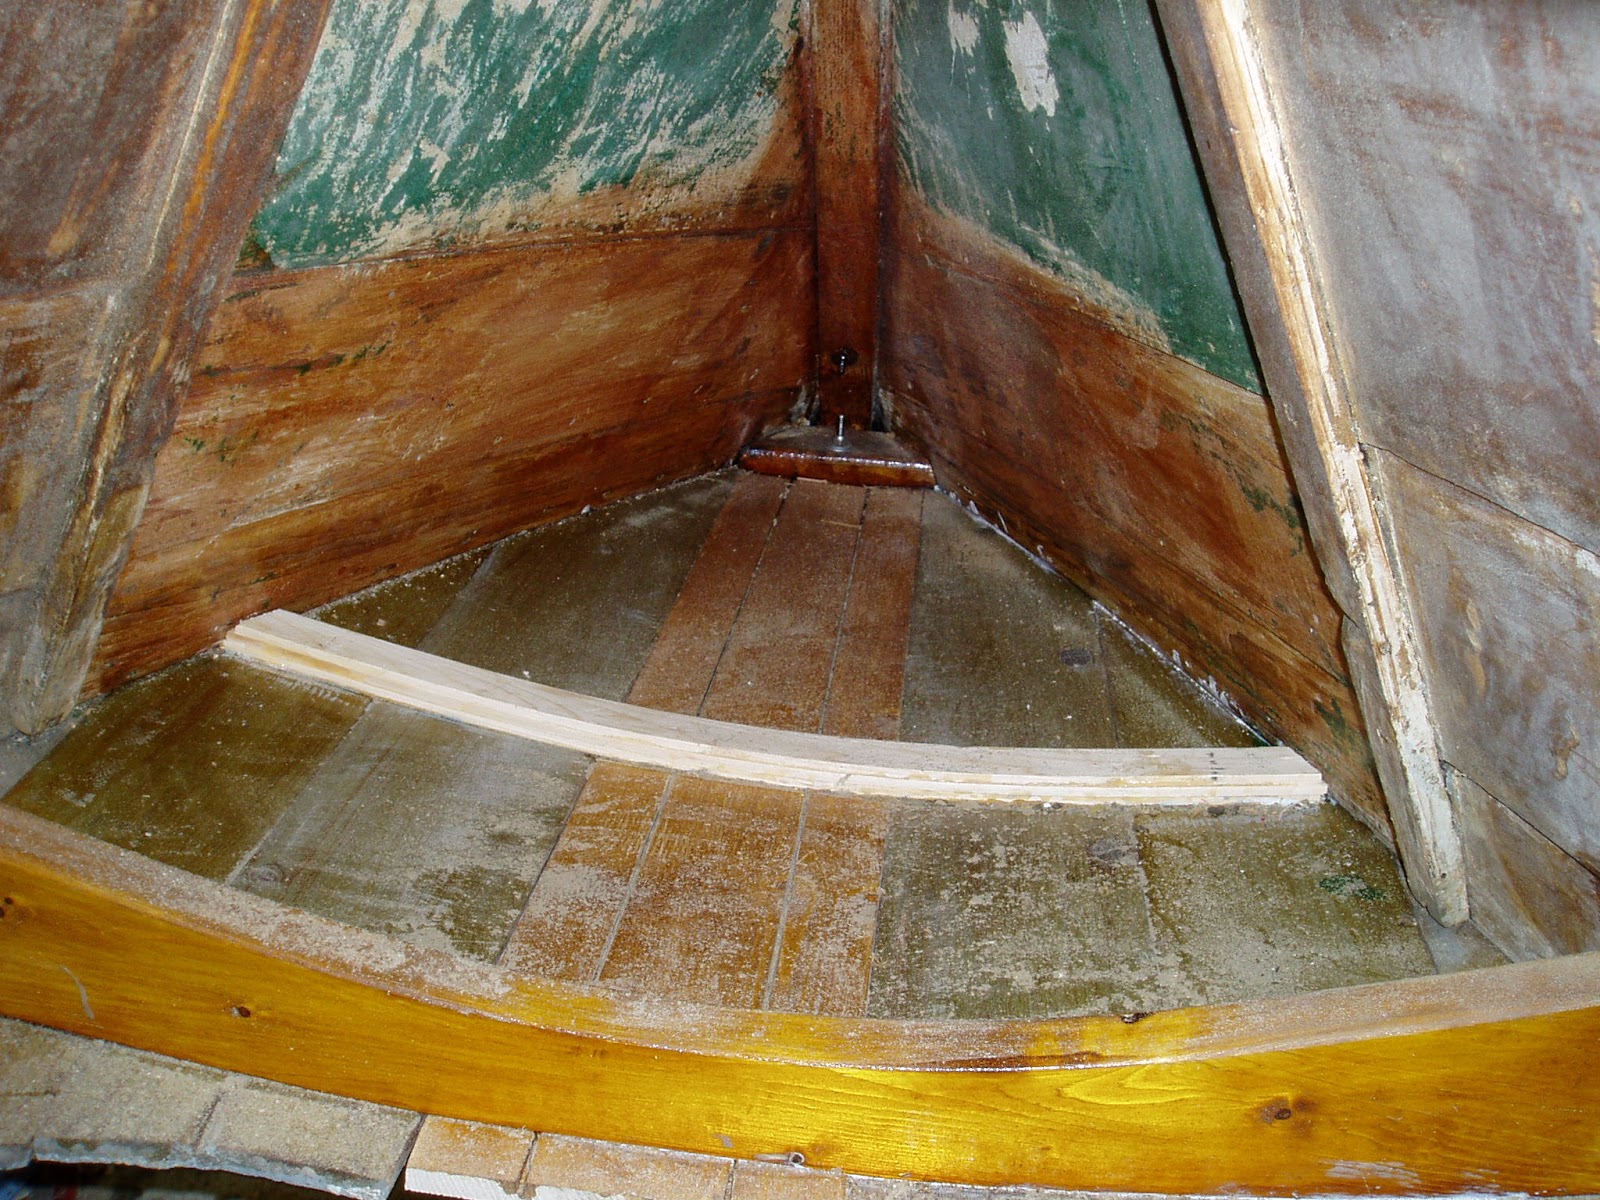
Here we are at a crossroads. The hull has been stripped, new bottom installed and glassed to the top of the garboard. All bare wood given two coats of CPES. All has been sanded, but what to do about the motor well? Here are some recent pics in no special order.
Filled in the missing piece pf 1/2 inch ply and glassed.
The glassed bottom and garboard have second and third fill coat
Top two strakes have been coated with two coats of CPES
All has been sanded smooth and ready for paint. Problem? What to do for a motor well?
More pics than I need but very please with how she looks, knots and all
Several pics of the aft end where a motor well might be installed. I have acquired two 1 1/2 inch through hulls and a length of 1 1/2 PVC that altogether make a fine motor well if that is the route I go. Problem? Having the motor in that vulnerable position makes it necessary to have a skeg to protect the motor from underwater obstacles. A full motor well, say 10 inches wide and 30 inches long would allow the motor to kick up and eliminate the need for a skeg, or at least allow for a minimal one for directional stability.
More pics of the area in question. The bottom is only 18 inches wide where it meets the transom.
Looking aft, the tubular motor well would be just behind the support for the aft deck
The tubular motor well would not addd any drag to the hull, but I fear the full on motor well might, or might not make enough drag to worry about. Thoughts?
If I go a full on motor well it might go in front of the deck support and it would allow for the well to be long enough to allow the motor to kick up into the boat. I really do not want to cut into the transom.
Here is my tape showing the distance from the transom to the first (last?) frame. I would really appreciate any thoughts on the location of and type of motor well.
Saturday, October 10, 2015
Saturday, September 26, 2015
More work on power dory, new bottom and floors
Scarfing the bottom panels together into one piece. Scarf is 8 to 1
What seemed like endless strokes of the plane...
Finally able to join the two pieces.
The slight warp in the plywood is an advantage as it will help conform to the rocker in the hull, here it is upside down waiting for a layer of fiberglass before flipping over onto the hull,
and here it is, all glued in place an trimmed to fit.
Pretty lines, looks just like a dory should.
Another shot of the trimmed off bottom, and
here she is being turned over. The come-a-long at each end makes it easy.
Not sure why this photo is here, shows the new center plank on the deck.
Right side up showing off her new bottom
hmmm, how did this get here
Before inside of garboard was stripped by scraping and sanding with 60 grit in my dustless Fein RO sander. Wish I had bought it years ago.
More sanding the inside.
Bow eye parts replaced and epoxied into the opening. Replaces part the crumbled, the rest seems fine.
Transom covered with 1/2 marine fir, top section will have to wait.
Fiber glass in place, no need to make cuts, glass followed the lines perfectly. Surprise!
Went well and looks great.
Hull flipped for more inside work.
Only bit of rot back where garboard joins transom. Dug it all out and then filled.
Intermediate floors in place to stiffen bottom and support floor boards
Another shot of floors. Fillet has been put along joint of garboard and new bottom, weave filled and ready for next step. All for now.
What seemed like endless strokes of the plane...
Finally able to join the two pieces.
The slight warp in the plywood is an advantage as it will help conform to the rocker in the hull, here it is upside down waiting for a layer of fiberglass before flipping over onto the hull,
and here it is, all glued in place an trimmed to fit.
Pretty lines, looks just like a dory should.
Another shot of the trimmed off bottom, and
here she is being turned over. The come-a-long at each end makes it easy.
Not sure why this photo is here, shows the new center plank on the deck.
Right side up showing off her new bottom
hmmm, how did this get here
Before inside of garboard was stripped by scraping and sanding with 60 grit in my dustless Fein RO sander. Wish I had bought it years ago.
More sanding the inside.
Bow eye parts replaced and epoxied into the opening. Replaces part the crumbled, the rest seems fine.
Transom covered with 1/2 marine fir, top section will have to wait.
Fiber glass in place, no need to make cuts, glass followed the lines perfectly. Surprise!
Went well and looks great.
Hull flipped for more inside work.
Only bit of rot back where garboard joins transom. Dug it all out and then filled.
Intermediate floors in place to stiffen bottom and support floor boards
Another shot of floors. Fillet has been put along joint of garboard and new bottom, weave filled and ready for next step. All for now.
Monday, August 31, 2015
Old bottom removed, ragged edges of the garboard trimmed, entire outside of hull has been stripped and sanded. Some, but not all of the wrought iron clinch nails with heads proud have been set with hammer and dolly. Progress.
Both sides, stripped with hot air gun and scraper, then sanded with RO 80 grit
Just a bit of the sheer strake left on this side
The transom is a mess, holes from previous lives, hard white filler here and there, not to mention the top edge needs to be replace. Cover the whole transom with 1/4 inch mahogany ply? Just Veneer?
Attempt at replacing the only broken frame
New deck beams, Closest is sawn and coated with shellac, center is laminated in place, both spruce. These two replaced the originals which did not inspire confidence. The center piece of the deck also had to be replaced. Ripped it out of a piece of spruce (original appears to be spruce).
View along the side of the nicely stripped and sanded hull.
This one shows the sheer, I like it. As I work I ponder the application of electric propulsion.
And another. Mess on the floor is getting ankle deep, must stop and clean.
Standing at the stem, shooting towards the stern. Below, a view of the foredeck.
Both sides, stripped with hot air gun and scraper, then sanded with RO 80 grit
Just a bit of the sheer strake left on this side
The transom is a mess, holes from previous lives, hard white filler here and there, not to mention the top edge needs to be replace. Cover the whole transom with 1/4 inch mahogany ply? Just Veneer?
Attempt at replacing the only broken frame
New deck beams, Closest is sawn and coated with shellac, center is laminated in place, both spruce. These two replaced the originals which did not inspire confidence. The center piece of the deck also had to be replaced. Ripped it out of a piece of spruce (original appears to be spruce).
View along the side of the nicely stripped and sanded hull.
This one shows the sheer, I like it. As I work I ponder the application of electric propulsion.
And another. Mess on the floor is getting ankle deep, must stop and clean.
Standing at the stem, shooting towards the stern. Below, a view of the foredeck.
Subscribe to:
Posts (Atom)